
Programming your robot to use AI
In this tutorial we will use (Scratch-like) block programming in Espruino, along with the A.I. in the Smartibot app, to make Smartibot to run away from people but still chase other things like dogs and cars. You should be able to use these techniques to use Smartibot to build your own A.I. powered creations.
How the standard A.I. behaviour works
The standard behaviour we have built into the Smartibot A.I. system is to chase whatever objects are selected in the 'Settings' menu. You can switch these on and off by pressing on them. If Smartibot sees something it thinks is one of those objects on the left of its view frame (the phone screen) it will turn left, if it sees something on the right it will turn right, and if it sees something in the centre it will drive forward.
This process is repeated every time the A.I. analyses what it can see. How often this happens is controlled by the FPS slider near the top of the 'Settings' menu. FPS stands for 'Frames Per Second' so the higher the number the more times it happens each second. Some devices are limited in how quickly the can run the A.I. so may not actually be able to achieve a FPS as high as has been set (think of the number as a target). Also, there is a limit to how many Bluetooth commands your device can send to Smartibot within a second and how quickly Smartibot can process them. This is particularly true with the standard behaviour because to make Smartibot move forward a bit or turn a bit we switch on the motors for between 1/10 and 1/6 of second and then switch them off again, so we can't really do that more than 6 times a second without instructions getting stacked up.
Whilst we are talking about sliders the other one, labelled 'Confidence', sets how sure the A.I. needs to be that the thing it has seen is actually the thing it is supposed to be looking out for, before it tells the Smartibot it has seen it. A.I. is never totally sure about anything but it at least able to let us know how sure it is. A higher confidence means the A.I. is less likely to make mistakes (like deciding a dog is, in fact, a sheep) but it is also more likely to fail to recognise something.
Programming custom A.I. behaviour
At the bottom of the 'Settings' menu is a switch labelled 'Custom Firmware'. If you switch this on instead of the app triggering the standard behaviour it will send code to trigger two functions called:
aiDetectC()
which is sent every time and the A.I. recognises something it is looking out for and includes three extra pieces of information (arguments); the type of object detected (or at least what the A.I. thinks it is), it's horizontal position on the phone (X) screen and its vertical position (Y)
and
aiResetC()
In this example we are going to make Smartibot do the standard behaviour when it sees anything apart from a person but, when it sees a person, do the opposite and run away (well reverse).
Getting started with A.I. programming
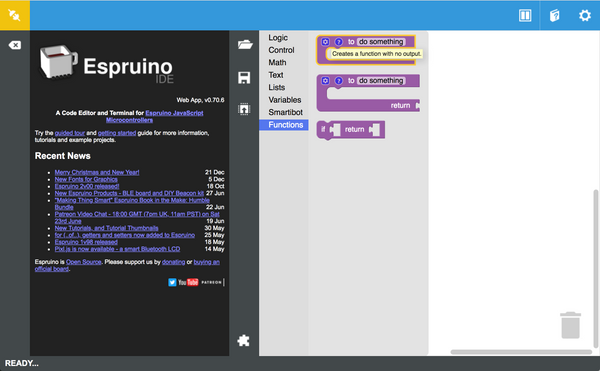
First of all make sure you've followed the instructions here to update your Smartibot firmware and you should be using using the Espruino IDE that is here.
Next you should create the two functions with the names above. In the blocks editor go into 'Functions' and pick the block that says 'to do something':
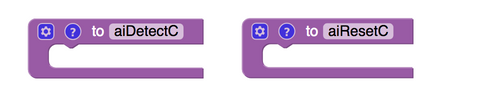
Pick two of those blocks and then rename them 'aiDetectC' and 'aiResetC'.
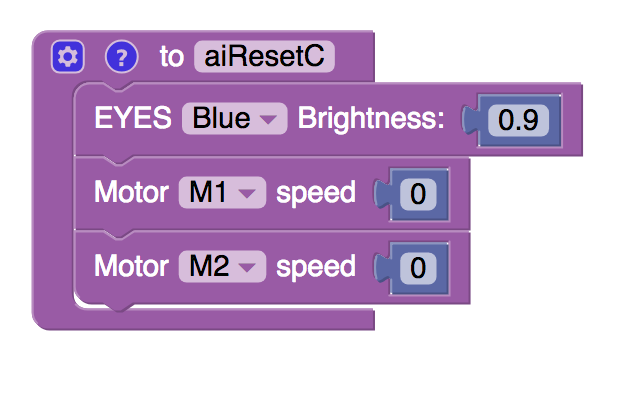
Now it's time to put in the code. We will start with the 'aiResetC' block and put in a block to change the colour of the eyes to blue and a pair to stop the two motors:
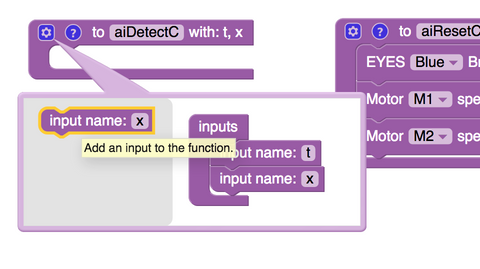
A.I. Detect function
OK, so that was the easy one. Now we need to do 'aiDetect', which is a bit more complicated. First of all we need to setup the block to receive the extra pieces of information (about what the A.I. has seen and where on the screen it is). We do that by clicking on the little blue cog in the top left corner of the block and, inside the pop-up, dragging three 'Input name' blocks underneath where it says 'input'. We need to change the names of these to 't', 'x' and 'y' ('t' for object type and 'x' and 'y' for horizontal and vertical position). We can make the pop-up disappear by clicking on the blue tick again.
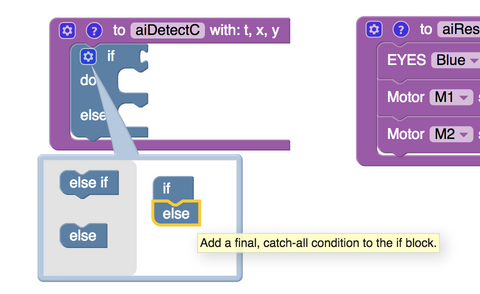
Now we can use these inputs in some logic, to define how Smartibot behaves, depending on what it has seen and where. To do this we need to go into the 'Logic' section and pick an 'if' block and drop it inside 'aiDetectC'. Like we did with the outer block we need to modify the 'if' block slightly by clicking he blue cog and dropping an 'else' block underneath in the pop-up.
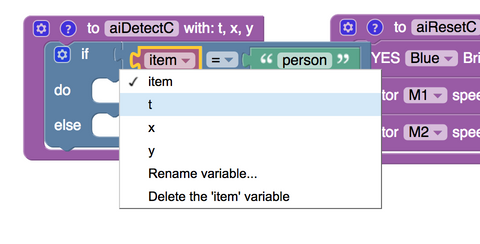
Next we need to write a test to put at the top of the 'if' block. If the test is passed whatever instructions we put in the 'do' section will get executed, if the test isn't passed whatever instructions are in the 'else' section will happen instead. We want the test to be whether the A.I. has seen a person, or something else. We create this using a ' _=_ ' block from the 'Logic' section, a ' " " ' block from the 'Text' section and an 'item' block from the 'Variables' section. If we click on where it says 'item' on that block we should be able to select any of the inputs we set up for 'aiDetectC'. We are interested in object type here so need to select t.
Our test is ready so now we need to put in the instructions for the 'has seen a person' situation - the 'do' section - and the 'has seen something else' situation - the 'else' section.
Running away A.I. behaviour
If Smartobot has seen a person we want it to reverse so we need to put two motor blocks in. Because of the way the motors are wired up we need to run M1 backwards and M2 forwards to get Smartibot to reverse. We make M1 go backwards by setting it's speed as a negative value.

Chasing A.I. behaviour
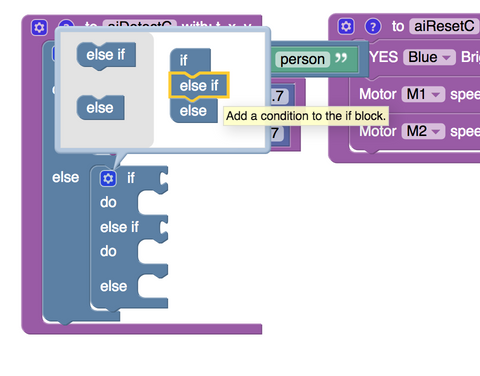
Running away from something is easier than chasing it because it doesn't really matter which exact way you flee as long as it's roughly away from what you are fleeing. This is why Smartibot just reversing in a straight line when it sees a person will work. To chase things Smartibot needs to actually drive towards them, which will not always be forward in a straight line. To accommodate this we need to add in another 'if' statement inside the 'else' section of the first one. This new one needs an 'else if' and 'else' section which we can add by clicking the blue cog.
We are going to add two tests that use the 'x' input (the horizontal position of the thing the A.I. has seen, relative to the screen) to work out if the thing is on the left or right of the screen. If both tests are failed, and the 'else' part kicks in, we know the thing is in the middle of the screen. We are going to use inequalities (greater than and less than comparisons) to check this. We can get these by picking a ' _=_ ' block from the 'Logic' section, clicking on the '=' and swapping it for the inequality we want.
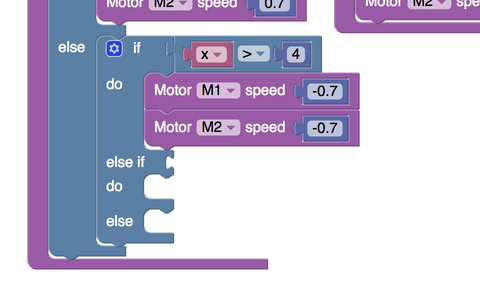
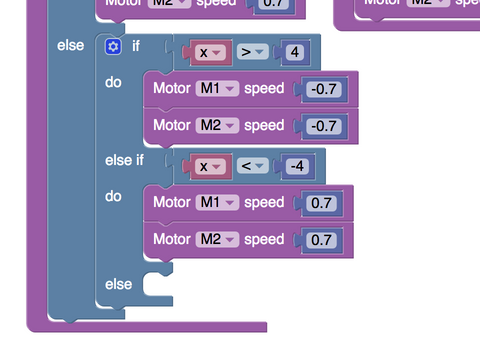
For the 'x' and 'y' positions that the A.I. sends, 0 is in the centre of the screen, so positive 'x' values mean things to the right of dead-centre and negative values mean things to the left. Since, unless you have made some additions, Smartibot can't do much about moving vertically, we are not interested in the 'y' values and will just use the 'x' ones. With all this in mind we will use the first test to see if the thing is on the right had side of the screen (has an 'x' value of more than 4) and add blocks to get the motors to turn Smartibot right.
Next we need the mirror image of this to make the Smartibot turn left if the thing is on the left of the screen.
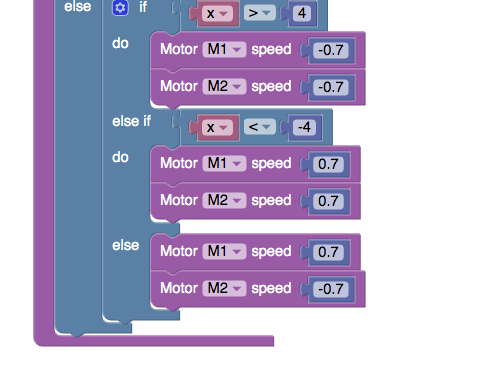
Finally we need to add blocks to make Smartibot drive forward if the thing is (not on the left or the right so must be) in the middle of the screen.
Stopping A.I. behaviour
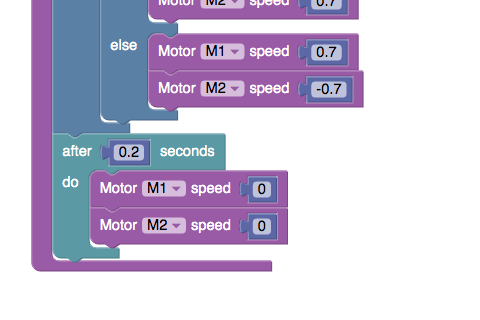
OK, that's the complicated bit out of the way but there's one more thing we need before we are done! At the beginning we talked about FPS, and how the A.I. analyses what the phone can see a fixed number of times every second. We can think of each time this happens as a step. In order to keep Smartibot under control we want it to drive a fixed amount every step, rather than just zooming off. To do this we need to add some blocks to switch off the motors a fixed amount of time after the 'aiDetectC' block has been triggered. We can do this by adding a 'after X seconds do' block which we can find in the 'Control' section. 0.2 seconds seems to work well but you can change this and see how it affects your Smartibot's behaviour. We want this step to happen no matter what the A.I. has seen and where on the screen it is so we need to put this block outside all of the 'if' blocks, so we just join it on underneath.
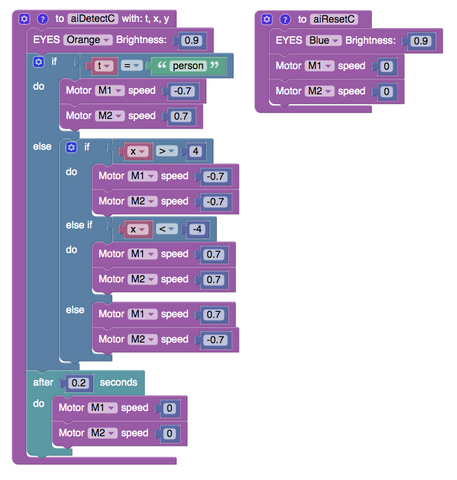
Here are all the blocks together. I added in one to change the eye colour to orange whenever the AI recognises something, above the 'if' blocks.
This has been a bit of a monster tutorial. Well done for sticking with it. Hopefull you now know how to use Smartibot's most powerful capabilities in your own creations. Please post videos of anything you make on the Subreddit!
Hi
How do I then run the program on my smartibot?