
DIY Flying Robot Drone
So you know that Smartibot kits are perfect for building robots and other STEM projects, controlled by an app or A.I. and, if you've looked at the other projects here you'll know our robot kits are also great for building radio controlled vehicles like cars and boats. We wanted to go one better and do something that flies, but we also wanted to make something really easy to build and safe to use. We've been watching the BBC/HBO adaptation of Philip Pullman's His Dark Materials, which is full of airships (or blimps, dirigibles, lighter-than-air craft or whatever you want to call them), so we decided to make one of them with a Smartibot circuit board, some motors, bamboo skewers and a couple of helium filled balloons from the party shop.
What you need to make your own blimp
- Smartibot circuit board (from a Smartibot kit)
- Bamboo Skewers (the kind you use for barbecuing)
- Two 9g servos
- Two mini propeller motors
- Glue gun
- Screwdriver
- Two helium-filled balloons 21 inches wide or one larger one.
Let's get making!
Building the fuselage
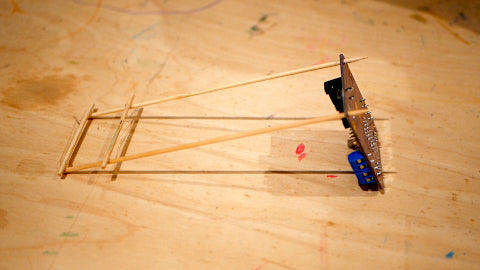
To build the fuselage of the blimp, we are starting off by sliding two skewers through the upper holes on the circuit board.
Cut three pieces from another skewer about 6 cm long. Then, apply glue on the ends of the fuselage, and stick one piece on. Hold it still until the glue had completely cooled.
3cm away from the first stick, apply glue and stick the piece on, keeping it parallel. It should now look like a rectangle, as shown on the left below:
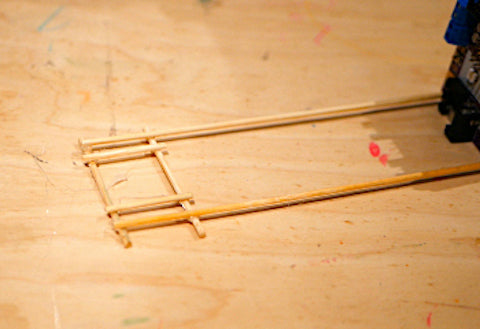
Once the glue has cooled, flip the structure over (so that it is flat on the surface/table), and cut two small pieces of skewer that are the same size as the width of the rectangle (about 2 to 3cm). Then, apply glue 1cm from each corner to stick the pieces. You will now have a window-like structure that looks like this:
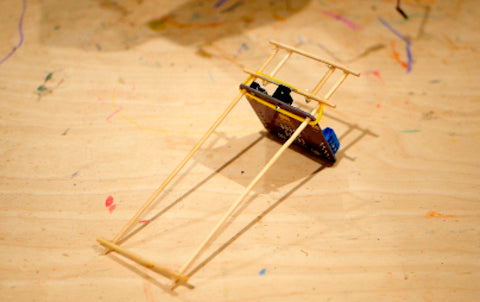
Slide the circuit board to the front of the fuselage, and wrap an elastic band around it and the bamboo parts to keep it secure. You can cut off the pointy ends of the skewers with pliers.
Then, apply glue to the end of the two skewers behind the circuit board, and stick another 6cm long piece of skewer on.
Mounting the servos on the fuselage
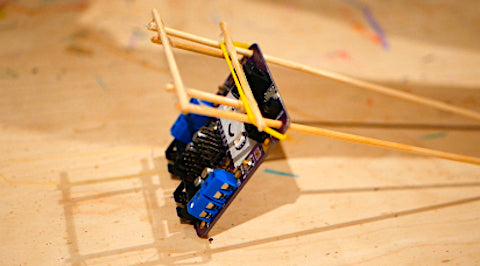
It's time to bring in the servos! Wrap an elastic band around a servo, and fold the elastic band over the wooden structure in the front to hold the servo on.
Repeat the same step for the second servo:
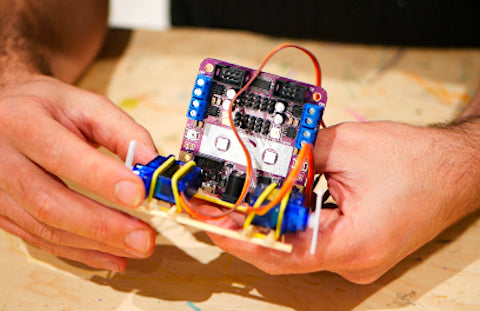
To connect the servos to the circuit board, take the wires and plug them into two of the connectors in the middle of the Smartibot board marked S1 to S10. Make sure the brown or black wire is at the bottom and the yellow, orange or white wire is at the top.
Attaching the drone motors
To attach the motors, apply hot glue to one side of the servo horn (the little white lever that is attached to each servo) and stick on the body of the propeller motor. Do the same for the second servo and propeller motor.

Wiring up your flying robot
To connect the propellers to the circuit board, connect the wires from the motors to the screw-terminals marked M1 and M2 on either side of the Smartibot circuit board. Connect the white wire to the top connection point and the black wire to the one below. Screw the connections tightly close so the wires don't work loose.
Lastly, connect the battery by plugging its three port connector into one of the unused S1 to S10 connections.
Making your robot control app
Connect the robot to your Smartibot app edit the 'Two Joysticks' controller. Delete one of the joysticks and create a vertical slider in its place. Map the slider to the two 'S' ports that your servos are connected to (depending on which way up your servos are, you might need to map them in opposite directions). Test if everything is working fine. The servos will go up and down when you move the slider and the propellers will spin when you move the joystick.
If one of the motors doesn’t run properly, check whether you have wired everything correctly.
Getting your robot airborne
Attach the fuselage to your helium-filled balloon by wrapping and knotting the ribbon around the bamboo structure. Make sure the knots are secure!
Now, let it drift in the air without driving it. Ideally, the blimp should be lightly descending when not moved (so you don’t lose it if the batteries die!). If this is not the case, try adding or some weight to it.

Hacky flying fun!
We had so much fun making this blimp with the Smartibot! This is our first flying creation with the Smartibot (ever) and we can't wait to see how you get along making the blimp. If you have any questions just send us an email at hello [at] thecraftyrobot.net or if want to share it with us on social media, check out our Facebook, Twitter and Instagram!