
Making a RC boat at home
Smartibot isn't just for making robots, you can use it to make all kinds of app controlled vehicles. Radio controlled boats are fun to drive but often difficult to build, so we designed this one to be really easy to make, using only common household items and the parts from the Smartibot kit. It's an ideal DIY craft project with a really fun result.
Using a Tupperware lunchbox as the hull makes it really easy to make your boat watertight and plastic spoons stuck to milk bottle tops make idea paddle wheels. The two motors that come in Smartibot kits make this paddle boat is surprising agile, fast and easy to drive with the app.
It's time to get crafty and creative!
What you will need/Materials:
- Tupperware lunchbox or sandwich container (make sure that it is leak proof to avoid any water going inside!
- 12 plastic spoons
- 2 milk bottle lids
- Large nail
- Craft knife
- Glue gun
- Tape
- Scissors
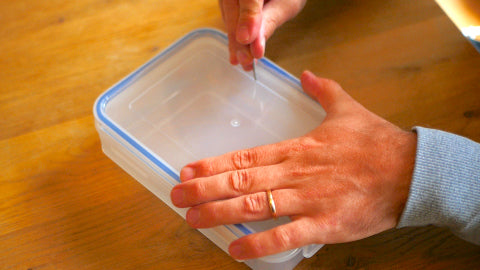
Transform the Tupperware
We are starting off by taking the Tupperware container (closed) and using the nail, to make two holes in the lid, one on each side.
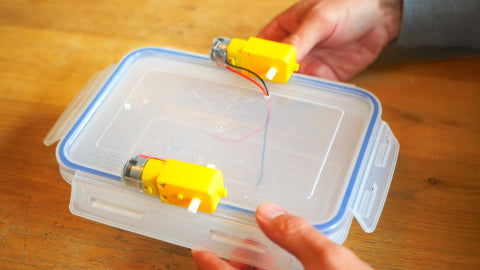
Then, get one of the Smartibot motors, and poke the red and black wire through one of the the holes you just made.
Apply some glue to the bottom of the motor and press it in place on the lid. Do the same for the second motor and second hole.
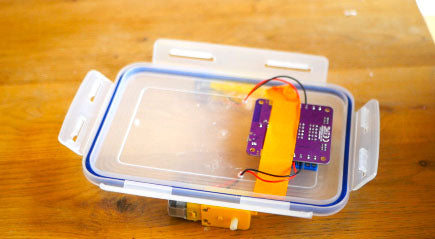
Connect the motors
Now that the motors are in place, it’s time to connect them to the circuit board. Take off the lid and flip it on its other side. Get the circuit board and for each motor, push the red wire in the upper chamber and the black wire in the chamber underneath.
When you’ve done that, flip the circuit board (so the smiley face is facing down) and tape it securely in place.
Place the lid back on the container and close it up.

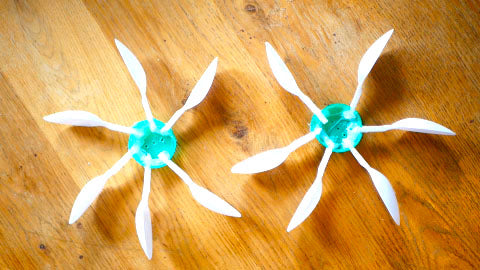
Make the paddle wheels
It’s time to make the paddle wheels! Use the scissors to cut off part of the handle of the spoon, leaving around 5 cm of handle left.
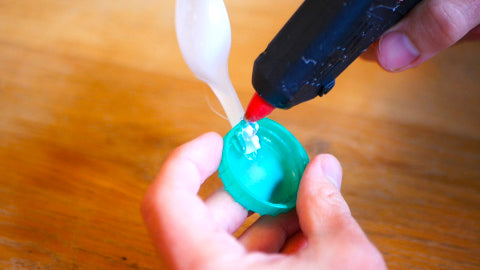
Then, use the craft knife to cut a small slot in the plastic milk bottle lid, wide enough to hold the spoon handle. We found that we could fit 6 spoons to each lid.
Apply a generous amount of glue inside the slot, and place the spoon handle inside. When it has cooled, apply some more glue on top of the spoon handle. Keep it still until it the glue has completely cooled and is solid.
Now repeat the same steps for the five other spoons, keeping them in the same direction.
Repeat the same steps for the second paddle wheel, but place the spoons in the opposite direction:
Attach the paddle wheels to the boat
To attach each paddle wheels to each motor, you will need a small white wheel mount, a pair of small bolts and nuts, and a small pointy screw, all of which come in the Smartibot kit.
Start off by placing the white disc on the paddle wheel (on the flat side) and making holes in the lid by pressing your craft knife through the three holes on the wheel mount. Then pass the two small bolts through the two larger holes in the wheel mount and the lid and use the nuts to fasten it all together
Next, place something underneath the Tupperware container to lift it up (a book or a roll of tape will do!) and bring in the paddle wheels and position it onto the motor shaft. Use the pointy screw to fasten it in place.
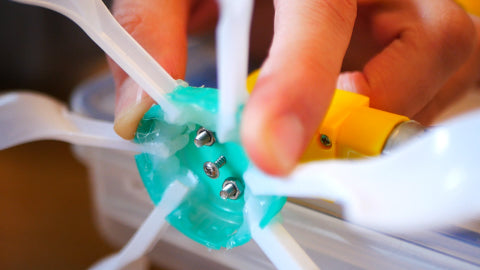
Repeat the same steps for the other motor, and try rotating the paddle wheel to make sure everything is attached securely.
Powering up your DIY boat
We are almost finished with our paddle boat! Remove the lid from the container, and place the battery box inside, in the centre. Use some tape to keep it in place.
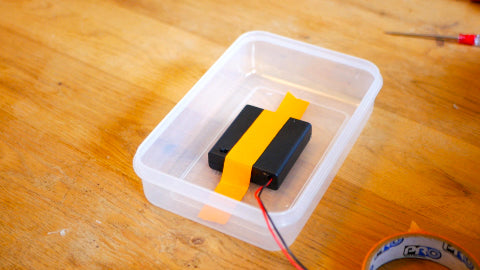
Switch the battery box on, plug in the circuit board and put the lid back on the container, making sure it is properly closed so no water will get in.
Time to drive your DIY paddle boat!
That’s it! Connect your paddle boat to the Smartibot app and you are ready to drive it around in the nearest body of water!
This DIY creation was very easy, and we had a lot of fun making it! If you are making this paddle boat, make sure to share it with us on Facebook, Twitter, Instagram or just send us an email at hello [at] thecraftyrobot.net.
We love nothing more than seeing everyone's creations with the Smartibot!